This plug-in provides a special type of "inventory" form and entry to manage materials, supplies, products, equipments etc in your warehouse, storage, office, and so on.
The purpose of this plug-in is letting you know the numbers of the pieces of your inventory and make it easy to prevent it from being insufficient.
Note: You may know the similar plug-in by the name of Forum6011: Equipments Management plug-in. This was designed to, for example, manage expiration dates and "who is using this and that?" of the stuffs such as computers and printers in offices. But of course, you can use the Inventory plug-in to manage equipment if you make it convenient, and vice versa.
License of the image; ji5718.JPG by Mark Goebel flic.kr/p/5VEYdy Creative Commons Attribution 2.0 Generic (CC BY 2.0) creativecommons.o….
Install
Click the link below to download com.traction.form.inventory-NN.zip file. (NN means the version number.)
Upload the zip file in Server Settings > Plugins page.
After uploading, you will see the I18N error as following. But don't worry. This error means "you need to restart TeamPage server to load the I18N resources (language files)."
Click [Restart TeamPage] in Server Settings > General > Manage Server page. If your TeamPage server is hosted in Traction's cloud environment, you will need to restart your server twice to load the I18N resources correctly.
After restarting, you will see that the plugin's name show up correctly.
Target Space(s)
Which space do you want to post the inventory entries in? In the existing space(s)? Or do you want to create a new special space for your inventory?
Existing Space(s)
You already have, for example, HR, Sales, and Development spaces, and you can post your inventory entries (articles) into those spaces.
This means items belong to HR division should be posted in the HR space, and item belong to Sales division should be posted in the Sales space, and so forth.
You can manage the inventory activities with the other activities in the space.
New Inventory Space
You can create a new space if you want to manage your inventory in one place (space). How about creating "Warehouse" space? Every inventory entry should be posted in this space, regardless of the division which the item is belong to. You can fill-in the division name (or any other information) into "Location" text field on the form.
In this article, I'm going to introduce how to post, edit, and manage the inventory entries in the "Warehouse" space.
Configurations
Let's get the following configuration done first to make it more convenient.
In Plug-in's Settings
Click [configure] to open the configuration view.
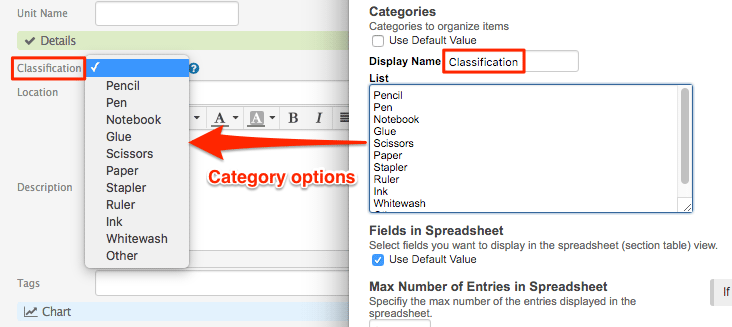
Categories
You can change the label (title) and options of the "Category" field on the form.
Default options, Desk and so on, are designed to be used in a furniture store. If you want to manage your stationery in your office, fill-in the following options.
Pen
Notebook
Glue
Scissors
If you are working for a drug store and wants to manage drug and medial stuffs, I suggest you to fill-in the followings.
Drug
Cosmetics
Supplement
FirstAid
You have to write one option per line. (Each option must be separated by a line-break.)
The option you select on the "Category" form should be added to the entry as a tag.
In Space Settings
Show "Inventory" Tab
Open Space Settings > Settings > Display page and find "Proteus Space Tabs". Select "Inventory" and move it from the left to the right.
You will see the "Inventory" tab.
Basic How-to
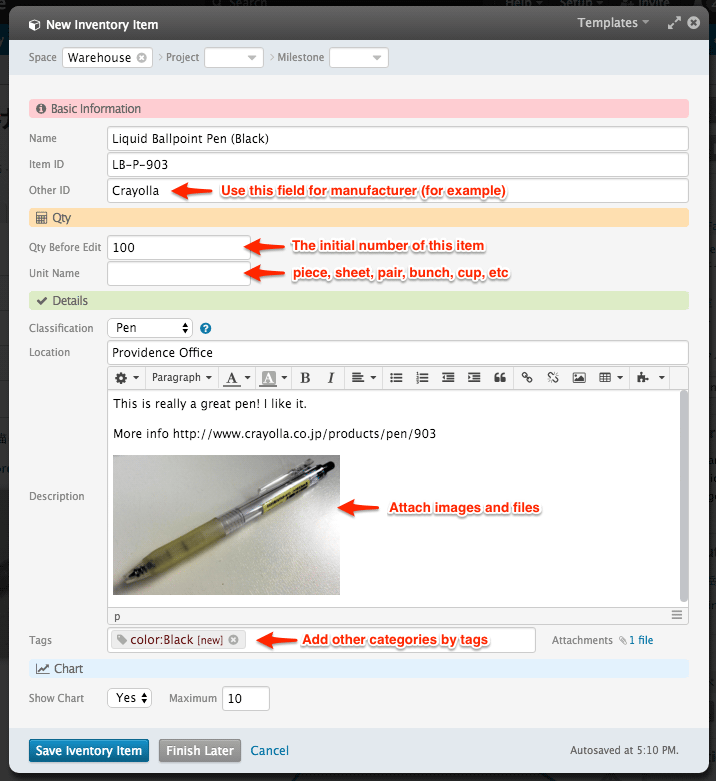
Create a new inventory entry
Click "New Inventory Item" menu in the side column to show the form.
Fill-in and select options in the fields on the form.
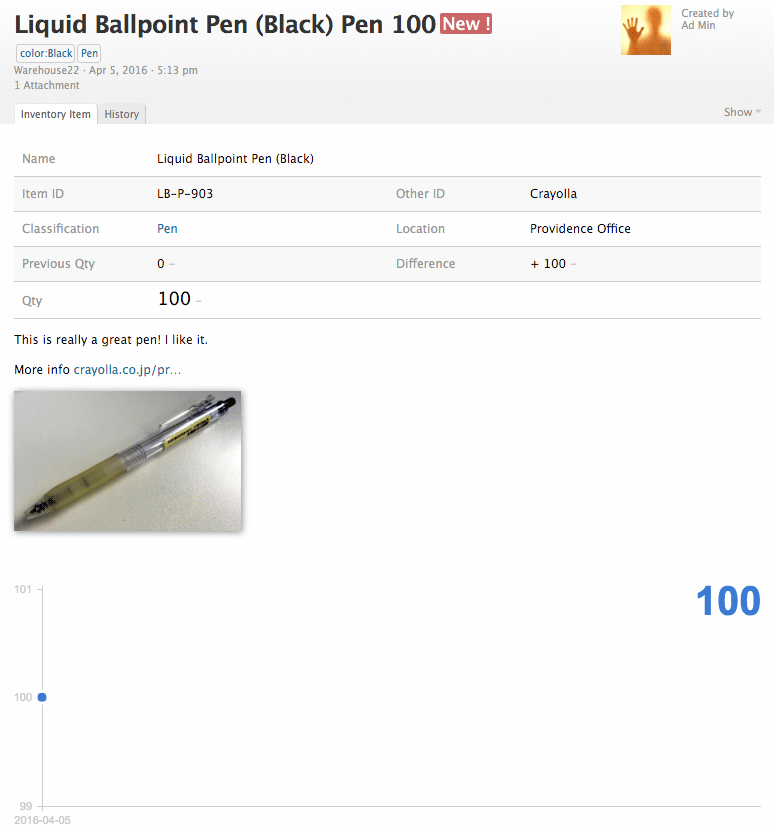
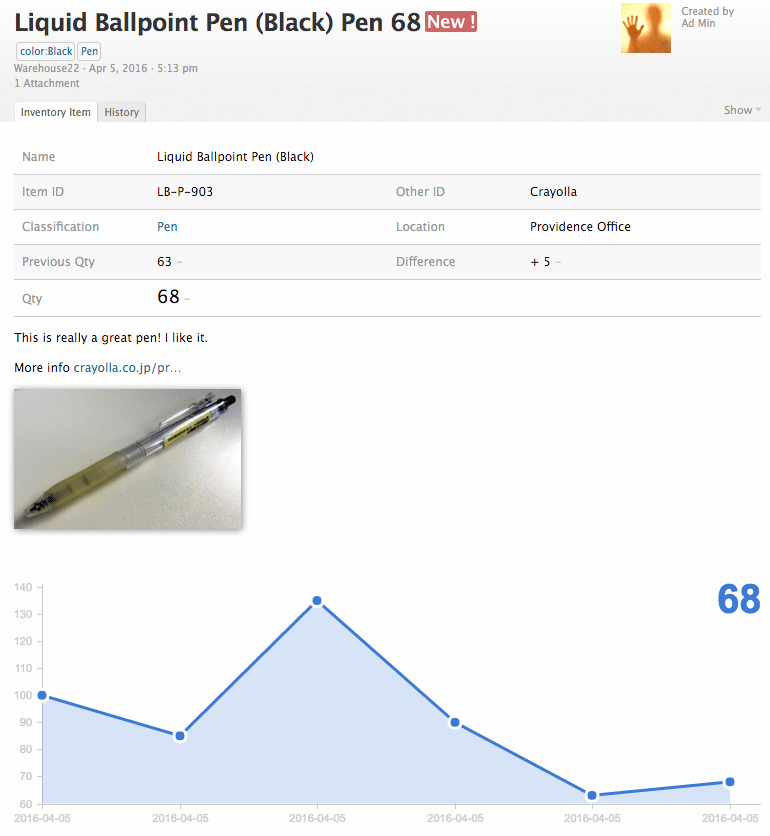
After submitting the form, you will get an inventory entry like this.
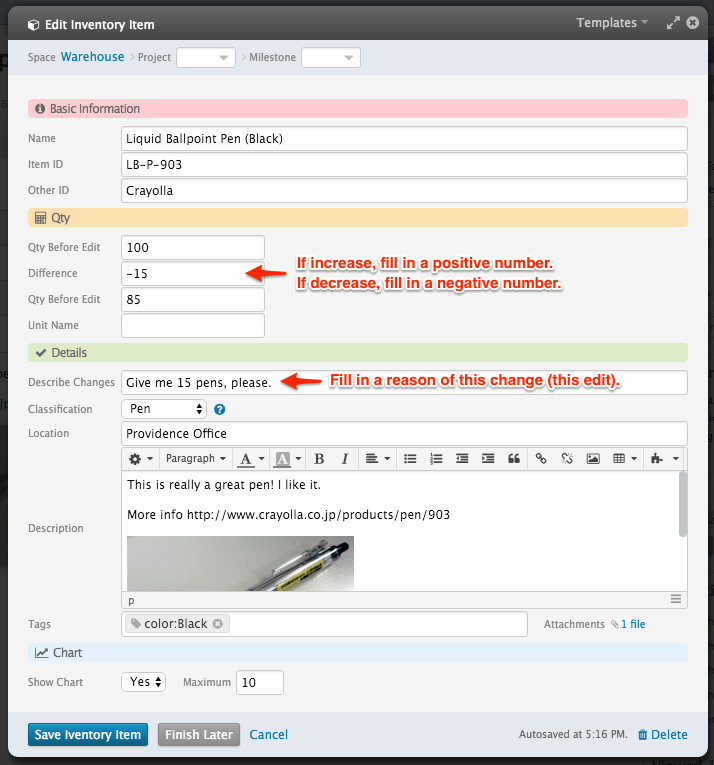
Edit an Inventory entry
Click "Edit Inventory Item" in the side column to edit the entry.
In the Edit form, enter a positive or a negative value in the "Difference" field and fill in a reason of the edit in "Describe Changes" field.
Chart
If "Show Chart" is set to "Yes", the changes of the number of the item will be rendered as a chart.
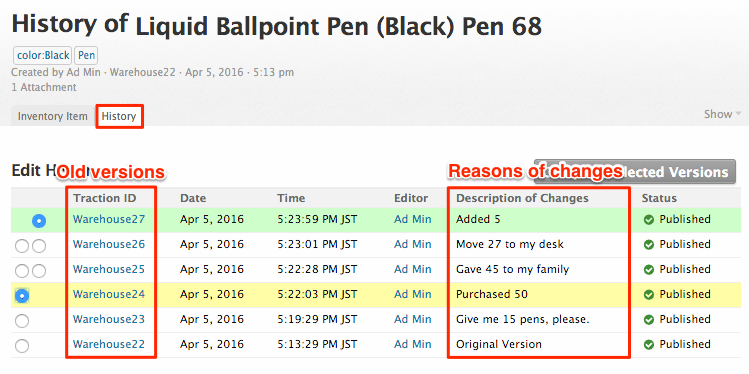
History of The Changes
If you have "View History" permission, the [History] tab will show up in the entry.
Spreadsheet Table
Open [Inventory] > [Table] tab to display the inventory entries in a spreadsheet like Excel. (This table feature is called "Section Table".) Click the heading row to change order. (sort ascending / descending)