To create a new journal, first type a name for the directory. This directory
will be created within the server/ directory. The name you choose must
be a valid directory name on your operating system. We
recommend that you not use any spaces or punctuation characters.
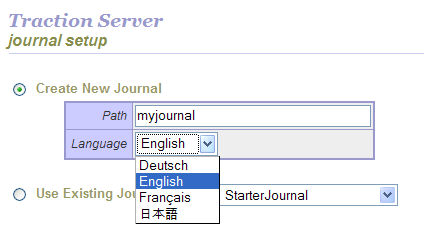
Choosing the Default Language
At this point, you can also choose a default language for your Journal.
The language that you select will determine the names of default labels
and sections. You can change your journal's default language later.
Once you have chosen a name and default language, click the Next button
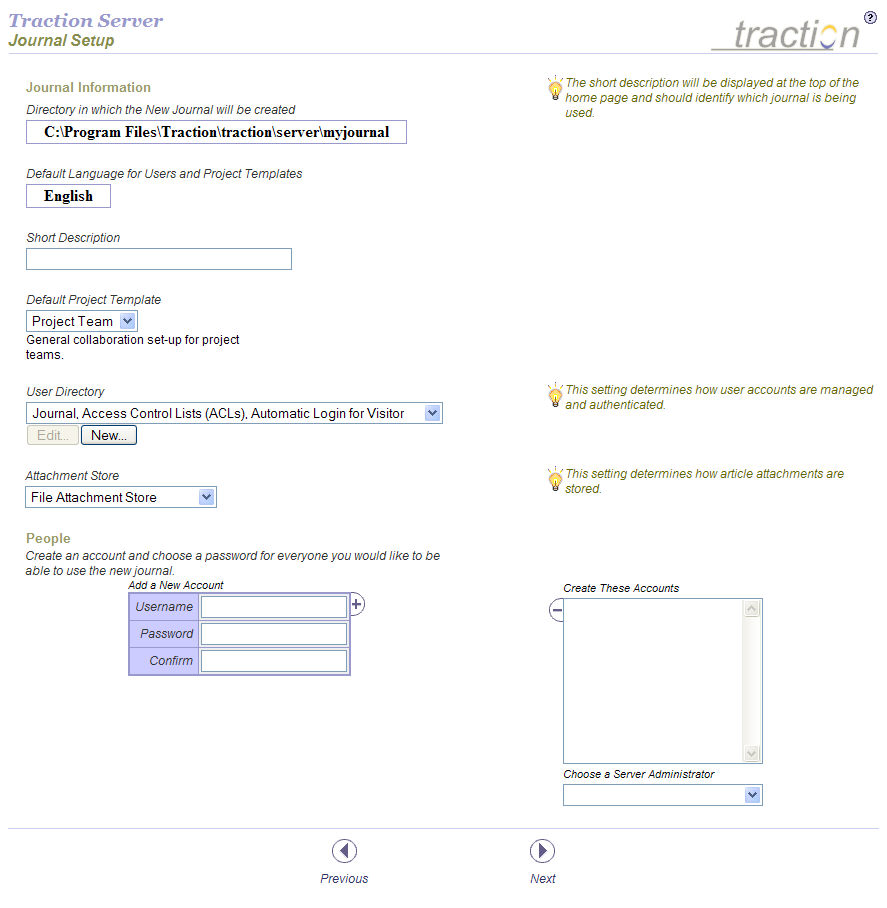
to go to the Journal Setup page:
This page lets you quickly create a journal to start working in. From
here you can connect to LDAP or Active Directory and create starting user
accounts. If you are creating a new journal while running an existing
journal, you can carry over the usernames and passwords from your existing
journal.
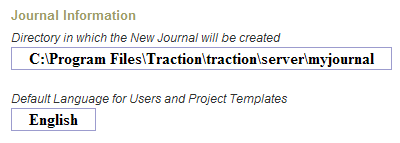
The first thing this page reports is the directory in which the new
Journal will be created. On
a default Windows implementation, it might look like this:
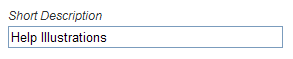
Setting a Description
Next, you can type a brief description for your Journal.
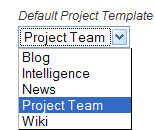
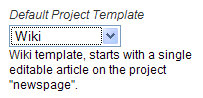
Choosing a Default Project Template
Next you can choose what template you would like to use (by default)
for creating new projects.
A description of each template appears underneath the selected template.
Selecting a User Directory
Next you can choose and configure a User Directory, which is where the
list of users is drawn from and maintained.
The first time you create a journal, Traction will default to its built-in
(Journal) based User Directory:
If you have already set up a journal, the User Directory listed will
default to the one used in your current journal.
If you would like to configure LDAP, Active Directory, or another external
User Directory, or you would like to learn more about the available User
Directory options, please follow the instructions in the section Choosing and Configuring a User Directorybefore
continuing.
Select the user directory that you would like to use. You can change
user directories later, and even migrate between user directories, e.g.
from the built-in Journal directory to Active Directory, from Active Directory
to LDAP, or from either of those to the Journal.
Choosing an Attachment Store
Next, choose whether to enable WebDAV for attachments (to learn more
about WebDAV in Traction, see the section What is WebDAV Used for in TeamPage).
If you would like to turn on WebDAV for attachments, select WebDAV attachment
store.
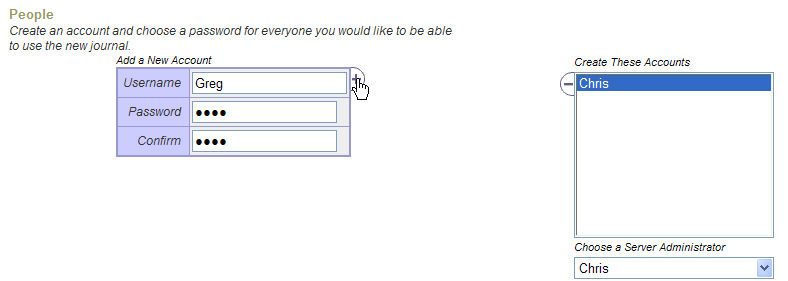
Adding User Accounts
Note: If the User Directory
you selected is configured to be the exclusive source of users, the people
section will not appear, and
you can skip to the next step.
This section lets you quickly create users.
To create a user, choose a username and password, then click the +)
button.
When you click the +) button, the account will be added to the list
on the right and selected.
You can click the (- button to remove the selected user.
Repeat this process for as many users as you like.
You can change usernames and passwords later, but you should make sure
to include one username for yourself with a password that you won't forget;
you will need it when you first login to Traction.
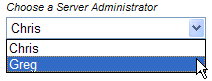
Select an Initial Server Administrator
Note that one user must be designated as the initial server administrator.
This is the user you will need to log in as to first access the Server
Setup pages in your configured journal.
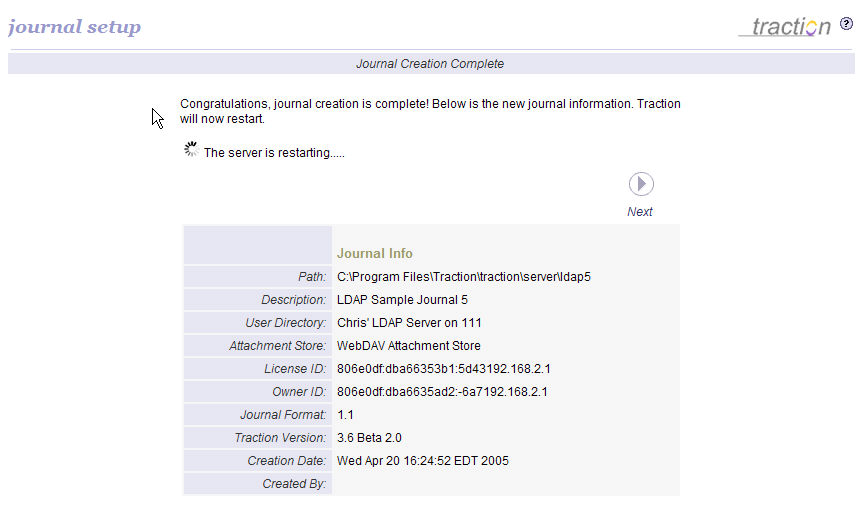
Creating the Journal
When you are ready to create your journal, click the Next button at
the bottom of the page.
This will initiate a restart and initial index creation.
When the restart has completed, you will see the following message,
and the Next button will become enabled.
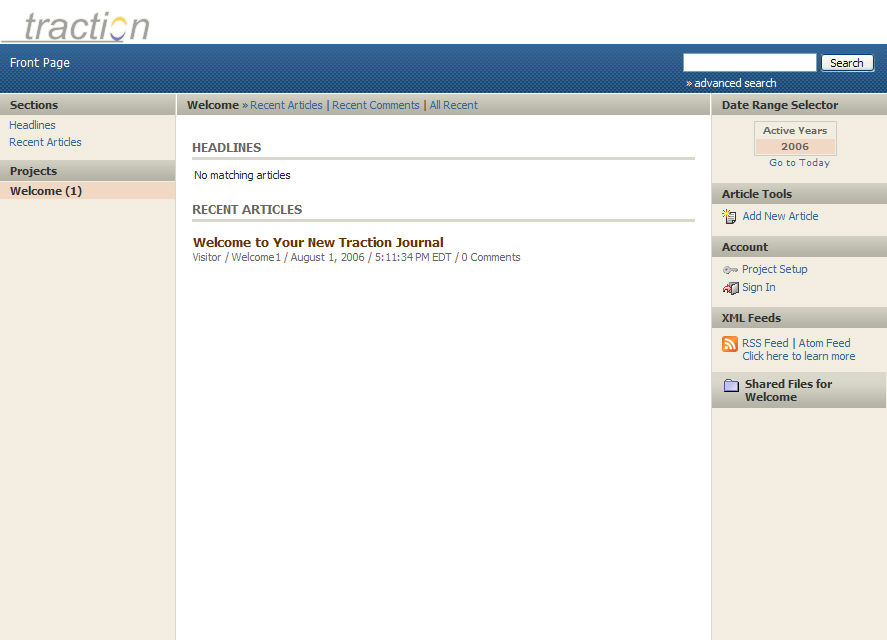
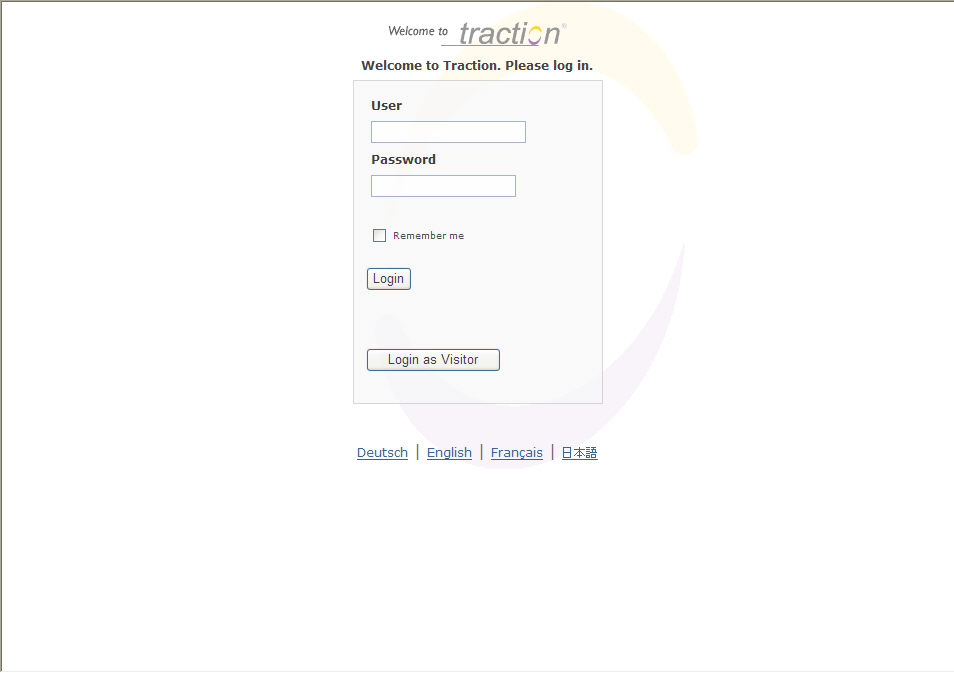
When you click the Next button, you will be brought to your live journal
for the first time.
Depending on the user directory you created,
you may get a login screen or a Front Page. If
you are using NTLM and Active Directory, you should already be logged
in using your Windows login account.