Checking Out
Note: Manually checking out a file does NOT lock it automatically, only indicates to others that you have it checked out. If you wish to also lock the file, see Locking Files for more information.
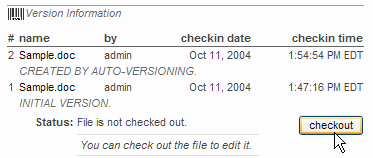
A version controlled file must be checked out in order to prepare the way for a new version to be created. This is as easy as clicking the "checkout" button in the version information section of the file's File Details view:
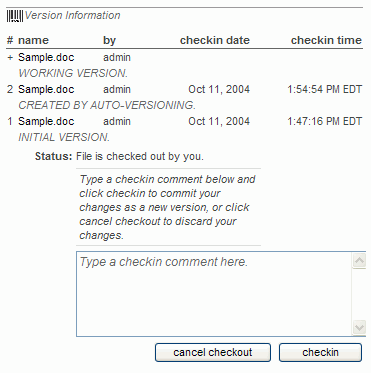
When you check out a file, you are telling the TeamPage server that you want to revise the file. To keep your non-finalized version separate from the last version, and to make sure that other users can see that someone else is currently working on the file (and the identity of the user doing the work), TeamPage creates a workspace for your revisions, and reports it in the File Details view. It also updates the version information so that everyone can see the most recent version:
Editing a Checked Out File
Microsoft Office Files and Microsoft Windows: Easy Editing
Some Microsoft Office file types may be editing directly in Microsoft Office on Windows. Please see the section entitled Editing Files in WebDAV.
Other Platforms and Other File Types: Downloading and Replacing
Using a non-Windows system with some Microsoft Office types, or to edit other file types, you will need to download a copy of the file to edit locally, and replace the existing file's contents. This can even be done with Microsoft Office files on Windows if, for example, you prefer working offline. (Make sure you check out the file before you download a copy.
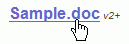
To download a copy of the file from the File Details view, right-click the name of the file at the top of the view, and choose "Save Target As.
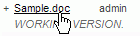
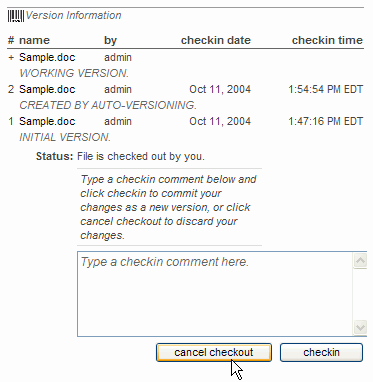
Observe that because you have checked out the file, the + appears after the version number to indicate the working version.
From Microsoft Windows Web Folder view or Macintosh webdavfs, you could also click and drag the file to your local file system; this effectively performs a download operation.
Open the local copy of the file, and make your revisions. Then you will replace the file. One way to do this is to use the File Details view's "replace contents" section. The replacement function is disabled for a file when it becomes version controlled, but it becomes available when the file is checked out to facilitate this kind of operation. Select the file using the "Browse.
Instead of using the replace contents option in the File Details view, In Microsoft Windows only, you can open the Web Folder view for the containing folder, and drag and drop the updated file into the Web Folder view. This will not destroy the version information for the existing file, and can be easier than the replace contents option. Dragging and dropping is okay for Windows users to upload their changes; but Macintosh users must use the File Details view's replace contents operation to upload their new version: due to the Macintosh's file saving algorithm, dragging and dropping to replace a file destroys the file's version history!
You can replace a file as many times as you want; when the file is checked out, a new version is not created by replacing the file's contents. Whatever version you have most recently uploaded to replace the existing version is the working version that will be accessible when someone clicks the link to the working version in the File Details view:
or in the CFI view of the containing folder:
Checking In or Canceling Check Out
Whether you've edited the file directly, or edited a local copy and replaced the contents of the file, as long as you checked out the file before you began, there is one more step to finalizing your changes.
If you don't want to keep the changes you've made, you should cancel your the check out you made earlier by clicking the "cancel checkout" button:
This results in the working version being discarded:
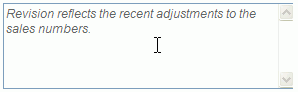
If you do want to keep your changes, it is time to check in. First, type a check in comment. Adding a comment maintains a record of why a file was revised, which is very useful whenever changes might be difficult for other users to pick out:
Then click the "checkin" button to finalize your changes:
Once the file has been checked in, the new version has been created. The version information is updated in the File Details view:
Attachments:
image255.gif
image256.gif
image257.gif
image261.gif
image262.gif
image258.gif
image259.gif
image260.gif
image263.gif
image264.gif
image265.gif
Article: Doc32 (permalink)
Date: March 22, 2008; 3:48:12 PM Eastern Daylight Time
Author Name: Documentation Importer
Author ID: importer
Date: March 22, 2008; 3:48:12 PM Eastern Daylight Time
Author Name: Documentation Importer
Author ID: importer