This plug-in lets you customize the locations and the combinations of the sections displayed on the project and the milestone dashboard views.
The settings are available in the All Spaces (default for all spaces) and the Space levels.
Download
Click the link below to download com.traction.pm.customdashboard-NN.zip file. (NN means the version number.)
Install
Upload the zip file in Server Settings > Plugins page.
After uploading, you will see the I18N error. But don't worry. This error means "you need to restart TeamPage server to load the I18N resources (language files)."
Click [Restart TeamPage] in Server Settings > General > Manage Server page. If your TeamPage server is hosted in Traction's cloud environment, you will need to restart your server twice to load the I18N resources correctly.
After restarting, you will see that the plugin's name show up correctly.
Settings
Click [Configure] to open the plug-in's setting view.
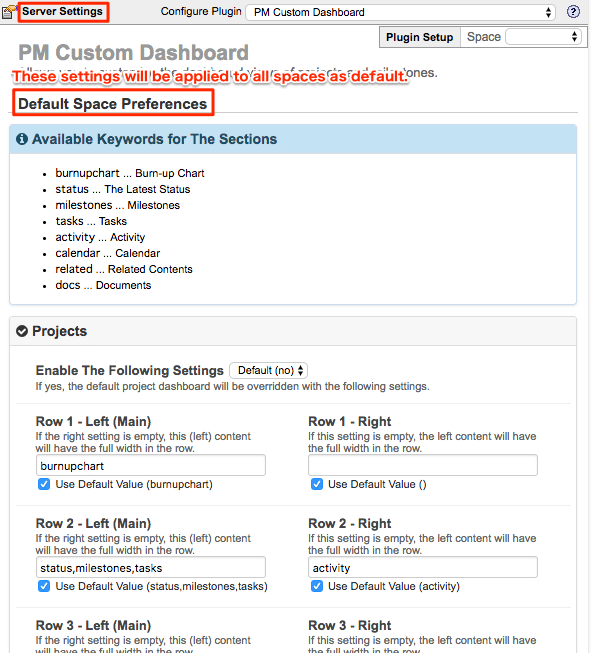
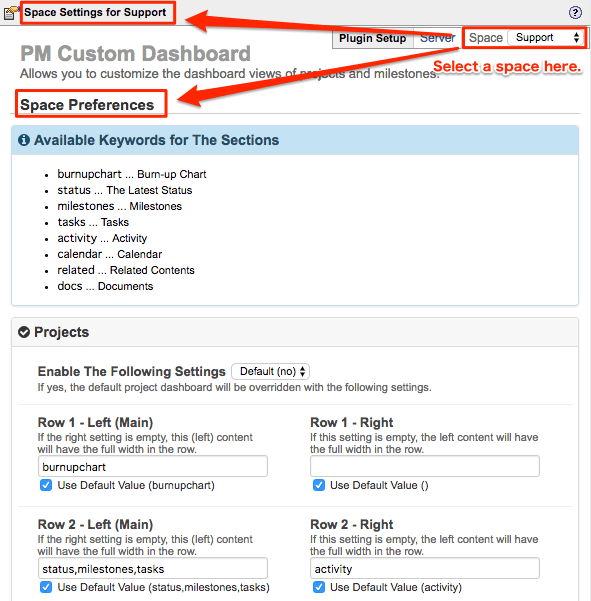
Server Settings vs Space Settings
If you want to configure the settings for all spaces as default, make sure that the title is "Default Space Preferences".
If you want to configure the settings in a specific space, select the space in the top-right drop-down list.
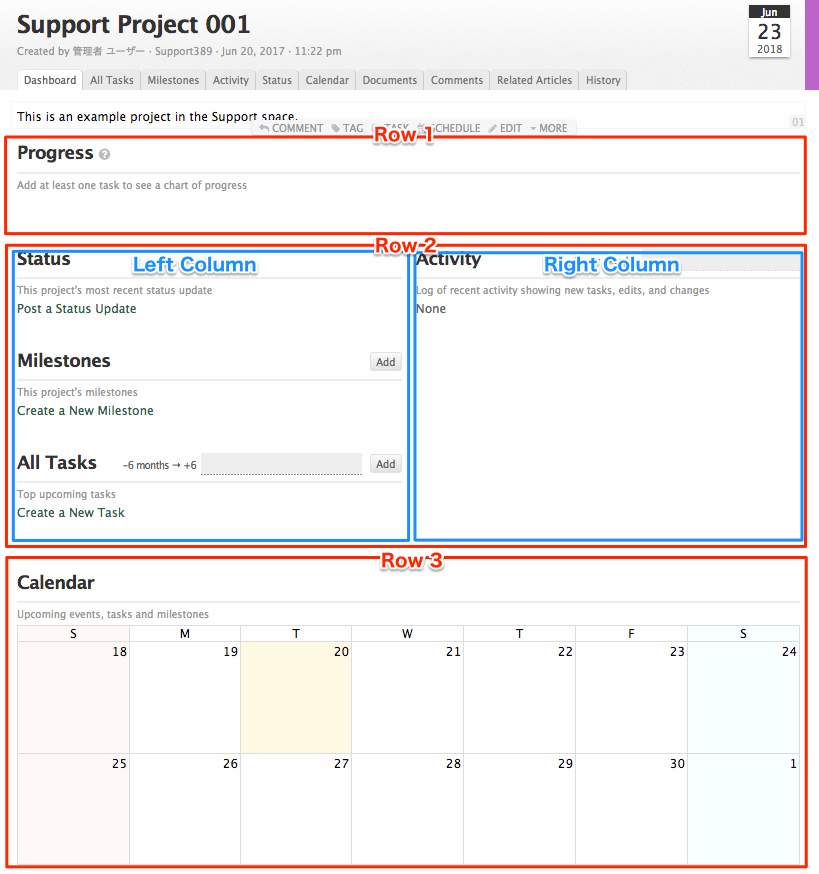
What are the rows?
Here is an example. The project dashboard consists of several "rows". Some of them have the left and right columns.
Available Keywords
These keywords are available to select the sections displayed in the dashboard.
burnupchart ... Burn-up Chart
status ... The Latest Status
milestones ... Milestones
tasks ... Tasks
activity ... Activity
calendar ... Calendar
related ... Related Contents
docs ... Documents
tasktable ... Section Table for Tasks New!!
Enable The Following Settings
Select "yes" to apply the settings.
Row and Column Settings
Fill-in the keyword(s) into the textbox to display the corresponding section in the dashboard.
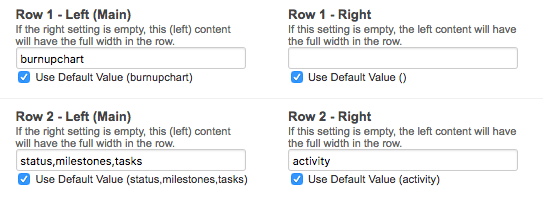
For example, the following settings in the picture means;
Display the burn-up chart in the 1st row. The width of the burn-up chart will be 100% (full-width) because the right column setting is empty.
Display the status, the milestone list, the task list in the left column in the 2nd row.
Display the activity feed in the right column in the 2nd row.
The left and right columns in the 2nd row will have the 50% width (half-width) because both of the left and right column settings are filled-in.
Example
This dashboard has the calendar section in the 1st row with the full-width, the tasks section in the left column in the 2nd row, the activity section in the right column in the 2nd row, and burn-up chart section in the 3rd row with the full-width.