ACL Note: ACLs are enabled by default in the CommunicatorJournal and for new journal creation. To upgrade existing journals to use ACLs, after installing Traction 3.
Active Directory Support: Traction 3.
This help note explains how to create Groups and Access Control Lists at the Server and Project level.
Server Setup | People tab
In the People tab, you can create global Traction Groups (which can be selected from any project) and you can control which users and groups have Login or Administer Server permissions.
Login permission is used in conjunction with Active Directory to determine what Active Directory users are permitted to use Traction.
Note: Until the first ACL is defined, all users have both Login and Administer Server permissions.
Creating Global Traction Groups
Click the Traction Groups button:
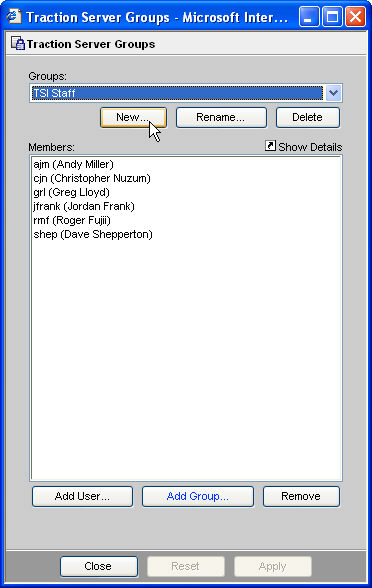
A Group editor dialog box will open:
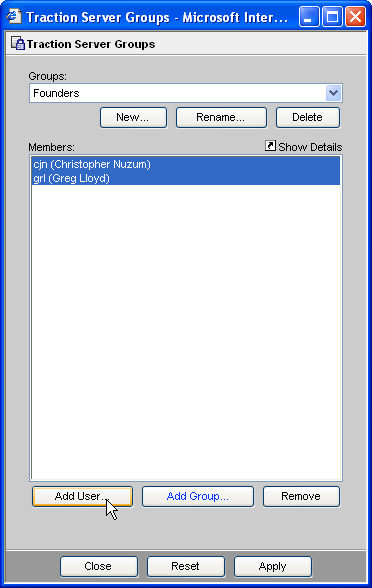
Click the New button to create a new group. You will be prompted to name the group, then you can add users or groups to the group. I created a group called Founders and included users cjn and grl.
Now click Apply and then Close. In the next section you will learn how to assign Login and Administer Server permissions to the group.
Assigning Login and Administer Server permissions to Users or Groups
Click the Access Control List button:
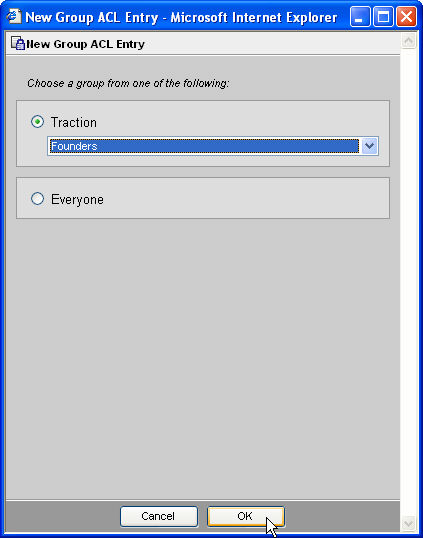
An ACL dialog will appear. Note that your new group is not listed. Click Add Group to choose it and click OK.
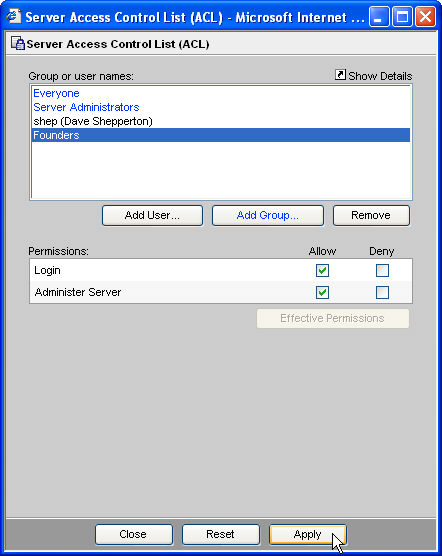
Now you can see the ACL with your new group and you can click the checkboxes underneath Allow to assign Login or Administer Server permission.
Warning: Be careful when defining ACLs and check your work before you press the apply button. It is very easy to lock yourself out of your journal, which will require you to get an owner-enabled license and owner login password from Traction Software. Make sure at all times that at least one user has both Login and Administer Server permissions. Note that if no ACLs are specified, all users have both Login and Administer Server permissions. When you first define an ACL that grants one of these permissions, that ACL becomes authoritative and only the specified users (or group) will have the designated permission.
When you are ready, click Apply:
Note that each user or group may belong to one or more groups. Accordingly, their Effective Permissions depend on the sum of all their permissions. You can click on any user or group, then click Effective Permissions to see their final computed permissions.
Project Setup - Members and Permissions
Project Setup | Members tab
In this tab, you can create groups for your project, or select global groups defined in Server Setup | People tab.
First, click the project's group button (in this example, we will work with the JFrank project):
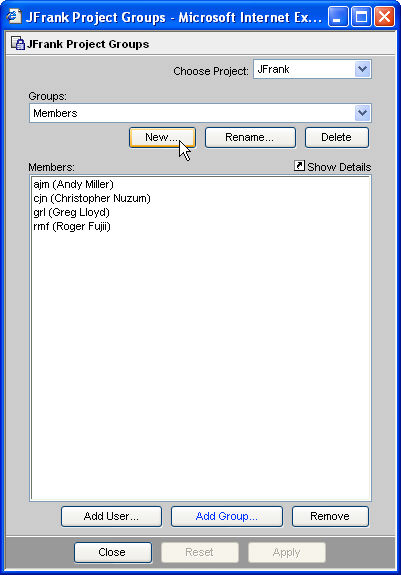
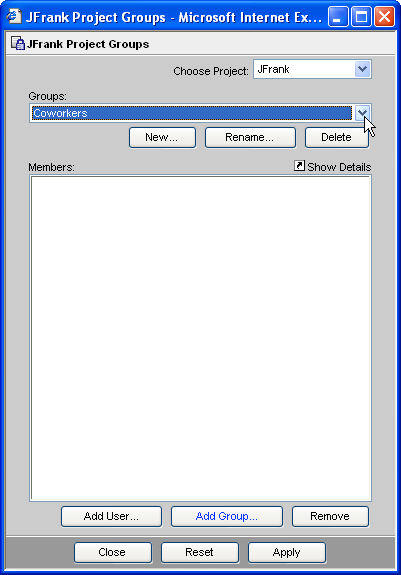
A Project Groups dialog will appear:
TIP: You can use the Choose Project control to edit the groups for other projects without closing the dialog.
Click New.
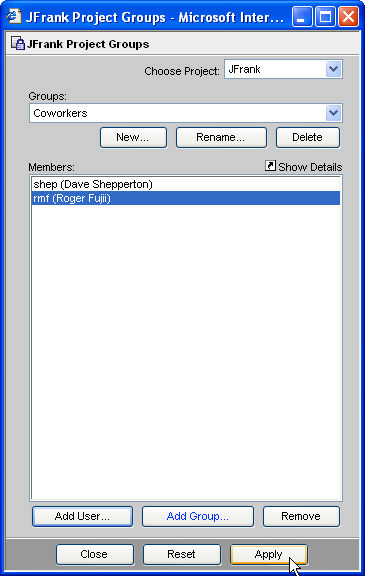
Click Add User to pick a User or Add Group to add a Group to this group. I selected User names Shep and Rmf: When you are finished defining the group, press Apply.
Now you can click Close to close the window.
Project Setup | Permissions tab
Now that you have defined groups, you can assign permissions to individual users or groups.
Click the Access Control Lists button:
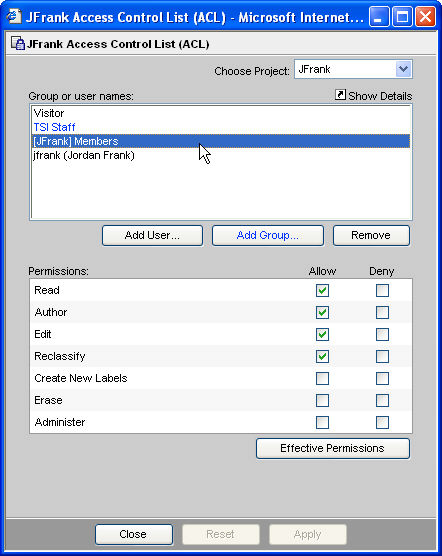
An Access Control List dialog will appear showing existing permissions:
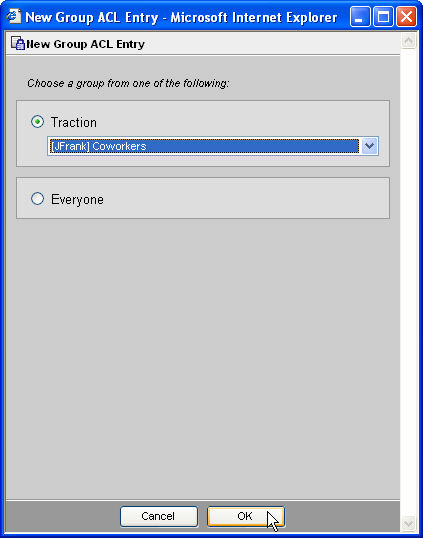
To add your new group to the list and assign permissions, you can click Add Group, a dialog will appear:
You can select the new group and click OK.
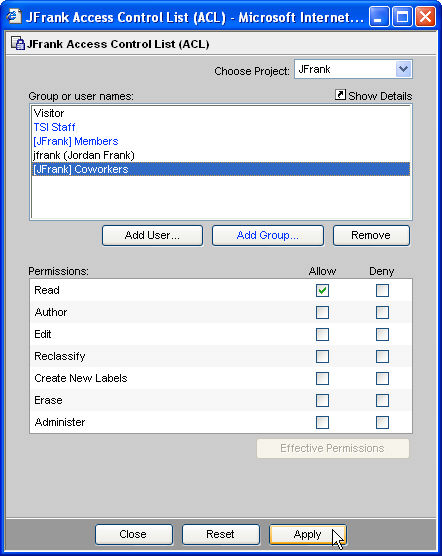
The new group will appear in the ACL dialog where you can set permissions for the group:
Allow and Deny
The Allow option provides the given permission. Allow permissions cascade; if a given user belongs to multiple groups, they will inherit all Allow permissions assigned to any group they are in.
The Deny permission overrides all Allow permissions. So, if you allow read permissions to a certain group, but choose to deny read permission to a specific user in that group, then that user will not be allowed to read the project.
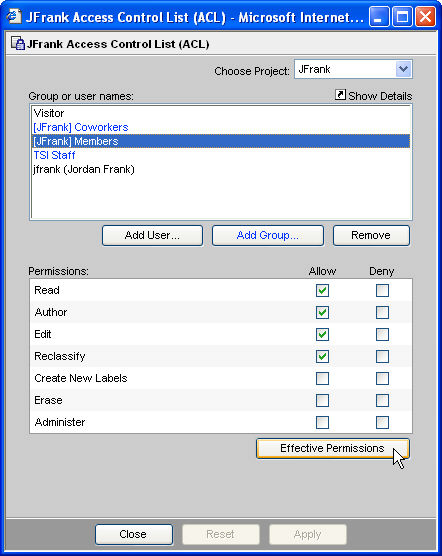
Effective Permissions
Since it is possible to specify permission for any user or group, and because its possible for an individual user to belong to many groups, the only way to know the ultimate permissions for any user or group is to click on the user or group in the ACL editor: and click the Effective Permissions button:
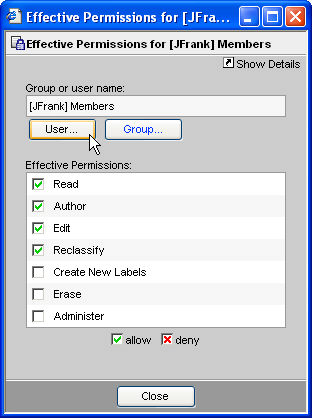
This will launch a dialog indicating the effective permissions for that user or group. From here, you can click User or Group buttons to select a different user or group and see their effective permissions.
Attachments:
image190.gif
image188.gif
image116.jpg
image117.jpg
image189.gif
image118.jpg
image120.jpg
image186.gif
image107.jpg
image108.jpg
image109.jpg
image187.gif
image110.jpg
image111.jpg
image112.jpg
image113.jpg
image115.jpg
Article: Doc312 (permalink)
Date: March 22, 2008; 4:25:07 PM Eastern Daylight Time
Author Name: Documentation Importer
Author ID: importer
Date: March 22, 2008; 4:25:07 PM Eastern Daylight Time
Author Name: Documentation Importer
Author ID: importer