Inviting People to TeamPage
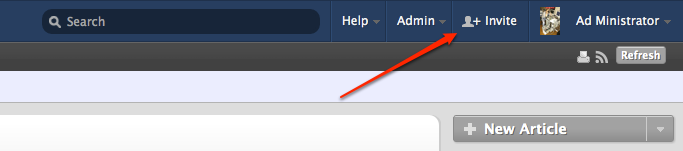
If you have server-level Invite permission, you will see this link at the top of most pages:
Use this link to invite people to become members of TeamPage spaces you also have permission to use. If you want to invite someone who may not already have a TeamPage account, all you need is their email address -- you don't need to know whether they already have an account.
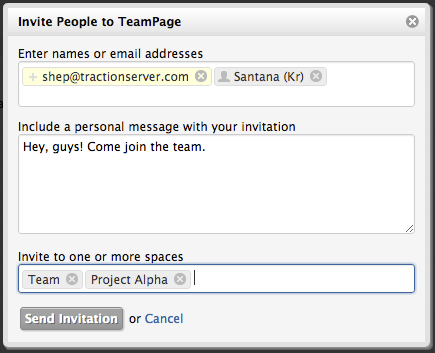
First, enter the names or email addresses of the people you want to invite. You can type specific email addresses if you know them, or you can start typing to get type-ahead completion results. TeamPage will search the names and email addresses associated with existing TeamPage accounts, as well as those from any external address book your server is configured to use. You can choose as many people as you want.
Note that for security reasons, Access Address Book permission is required for you to get type-ahead completion matches on names and email addresses. If you have Access Address Book permission, email addresses you enter that are associated with existing accounts will be resolved to those accounts so you can see who you're inviting. Otherwise, email addresses will be used exactly as you type them, and TeamPage will not be able to tell you whether or not hey are already associated with some account.
Next, you can add a personal message inviting them to the new space.
Finally, choose which spaces you would like to invite the users to join. Type a few leading characters of the space name to get type-ahead completion on space names.
Although the permissions that invited users are granted is configurable per space, keep in mind that invited users will likely be able to see any private information shared by members of spaces you invite them to join. The specific permissions of people added to a space using an invitation depends on the ACL permissions granted to the Invited group defined for that space and can be set up by person with space setup permission.
Also note that administrators can disable invitations for some spaces whose membership and permissions needs to be controlled by a server or space administrator. You also must have a specified minimum set of permissions an a space in order to invite other people into that space. The permissions that are required are configurable per space, but by default, you only need permission to read published articles. Administrators may set the minimum permission threshold higher for some spaces.
If you try to send an invitation for one or more spaces in which either the invitation feature has been disabled or in which your permissions don't meet the minimum requirement for inviting users to the space, TeamPage will tell you that you can't, and you will have to remove those spaces from the list if you want to continue with the invitation.
When you click the Send Invitation button, TeamPage will create new accounts for any email addresses that don't already belong to an account, add any new or existing user accounts as members of the spaces you chose, and send an invitation email to each user.
There's no need to worry whether the people you invited already have accounts, if you or someone else has already invited them, or if an administrator has already granted them permissions in the spaces you're inviting them to join. If you think someone may not have received their invitation, you can invite them again and another email invitation will be sent to them.
If you invited the users to a single space, the invitation message they receive will have a link to that space's main page. Otherwise, the link will bring them to the server dashboard.
Accepting an Invitation You Received
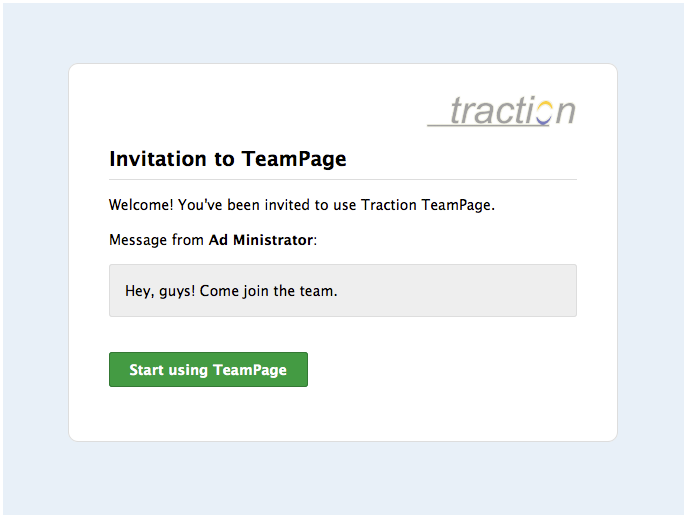
If you have been invited to use TeamPage by another user, you should receive an email like this.
Existing Users
If you already have an account associated with the email address to which the invitation was sent, the invitation may have some new permissions to one or more spaces. Click the link to start using TeamPage to sign in if you're not already.
If your administrator has enabled it, you can use the "[[Forgot your password?]]" link on the sign in form. If you forgot your user name, use your email address instead.
New Users
If this is your first time using TeamPage, a new account has already been created for you. To claim your new account, you must click the "Start using TeamPage" link in the invitation email you received.
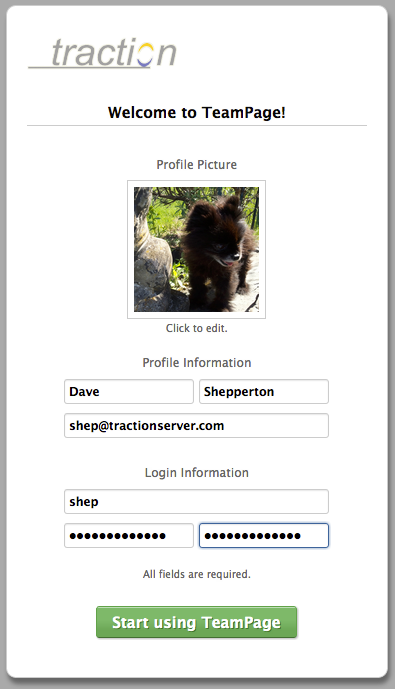
When you do, you will see a page like this that asks you for some basic information.
Important: In order to be able see the above page, invitees must be granted the Modify Account server permission. This is commonly done by granting this permissions to Everyone. If this permission is not granted, a login screen will appear instead of the screen above.
You don't have to fill in any of this information if you don't want, but entering your name and choosing a profile picture will make it much easier for other users to find and identify you. If you don't want to enter any of this information now, you can do it later. See Editing Your Profile and Personal Setup.
As soon you're done here, you're ready to start using TeamPage.
Email Notifications and Email Digest
Before you accept your invitation, you may receive email notifications or an email digest. In TeamPage, by default, you'll receive email notifications covering at least activity on tasks that are assigned to you. Depending upon how your TeamPage server has been configured, you may also be subscribed to the email digest by default.
If you don't want to get all of those messages, don't worry. As soon as you claim your new account and complete the Welcome form, you can change your subscriptions or unsubscribe completely.
Even if you haven't yet claimed your new account, if you're receiving email notifications and you see a message like this at the bottom of the notification email, you can add your own comments by replying to those messages:
You may also be able to add your own articles, tasks, and more. See Sending Email to TeamPage for more information.
For Administrators
The invitation feature is designed to painless for both users and administrators, while being configurable to support use of invitations for both open and tightly controlled TeamPage servers and spaces. For example, invitations can be enabled by default, and selectively disabled for particularly sensitive spaces.
Custom User Directory Configurations
Invitations work seamlessly even if your TeamPage server has security principals from Active Directory, LDAP or another identity service associated with user accounts. Users who are inviting other people will even get email address completions from your identity service, and the security principals corresponding to those email addresses will be associated with any new accounts that are created during the invitation process.
Invited Users and the "Invited" Group
When people are invited to use TeamPage, the security principals for each newly created or existing account will be added to a built-in Invited group in each of the spaces the users are being invited to.
The first time you upgrade from an earlier version to TeamPage 5.
Starting with TeamPage 5.
The space level Invited group can't be deleted. But you can modify or remove Invited ACLs or add Invited to an existing space or server level group to manage permissions that invited users will get in that space.
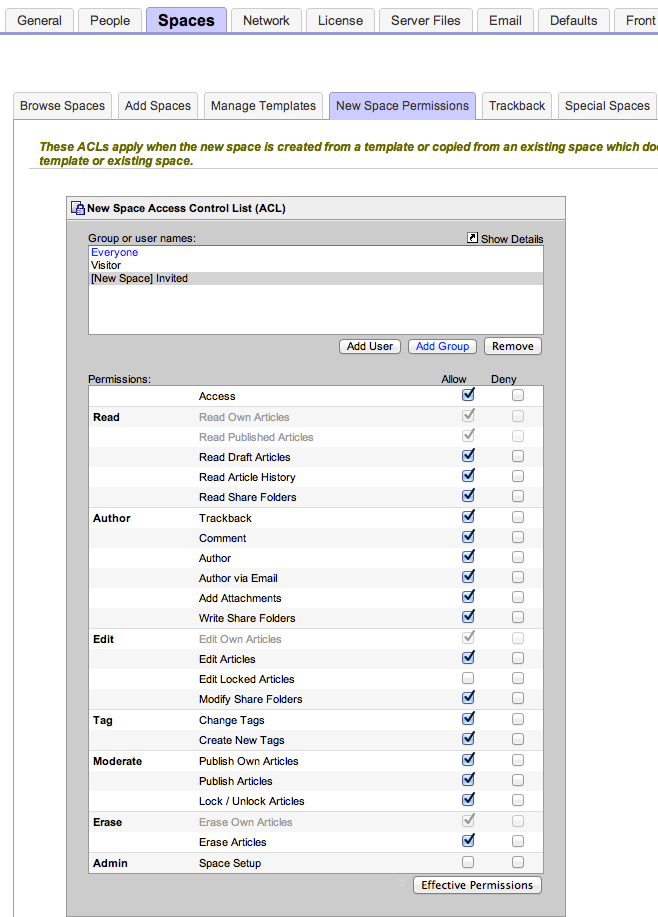
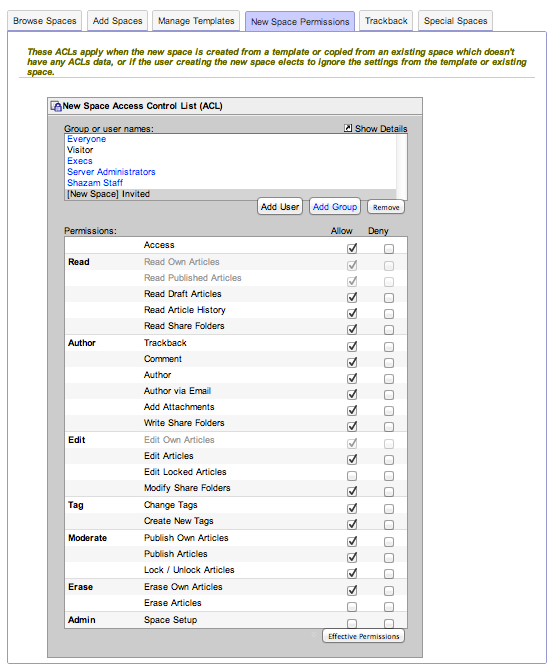
The New Space ACLs editor has an ACL entry for the Invited group that will be created in a new space. This ACL entry can't be removed, but you can edit the ACL "Allow" and "Deny" rules, removing all the "Allow" rules if you wish.
Ensuring Smooth Operation and User Experience
Since the Invited group is automatically created in every space, and there's an ACL entry for that group in the space's ACLs data, by default you shouldn't have to do anything if all you want to do is to ensure that your users can use the Invitation feature.
If you're copying settings from an existing space, whatever groups and ACLs are defined in that space will also be copied, along with ACL settings of the Invited group. Space level groups including Invited, are copied into the new space, and any ACL rules that are copied will also be modified to refer to the new space's copy of the source space's group.
This means that when copying from an existing space or a template with group ACL data, your new space will inherit the permissions that apply to invited users along with other space settings.
The New Space ACLs mentioned in the last section are only used if you are either creating a space from a template or space that does not have any groups and ACLs data of its own, or if you uncheck the "Use groups and ACLs (instead of defaults)" when creating a space. (Please see Creating a Space for further details on this subject.
When you're done creating a new space, it may be a good idea to take a moment to review its ACLs to ensure that newly invited users added to the Invited group will have appropriate permissions.
New User Accounts Created for Invitations
Note that new user accounts created automatically during the invitation process are also still added to whatever security principal group has been designated on the Server Setup | People page's New User Account Defaults tab. This means that new user accounts created during invitation will generally have all the same basic level of permissions that they would if they had been created any other way. (See Creating New User Accounts.
You may even find that even as an administrator, you would prefer to use the invitation feature if you ever have to create a new account on behalf of someone else. But if you'd rather have more control over the new account, you can still create it using the Server Setup | People page's Add Users tab.
Enabling and Disabling the Invitation Feature
We hope you can use this feature to get the most out of your TeamPage server. But if you have security concerns, you're worried about hitting the maximum number of named accounts allowed by your license, or you just aren't yet ready to have a lot of new users start using your TeamPage server, you can turn the invitation feature on or off selectively for individual users, groups of users or individual spaces.
The Invite Permission
The Invite permission is a server level permission that controls which users are allowed to use the invitation feature. You can think of it as a master switch that applies to users.
When you first upgrade to TeamPage 5.
The effect of this is that users who had Server Setup or Access Address Book permission will automatically have Invite permission unless you modify the ACLs that apply to them.
You can edit your server ACLs from there to add or remove Invite permission for users or groups of your choice.
If a user does not have Invite permission, they will not see the "Invite" option at all.
Space-Level Invitation Settings
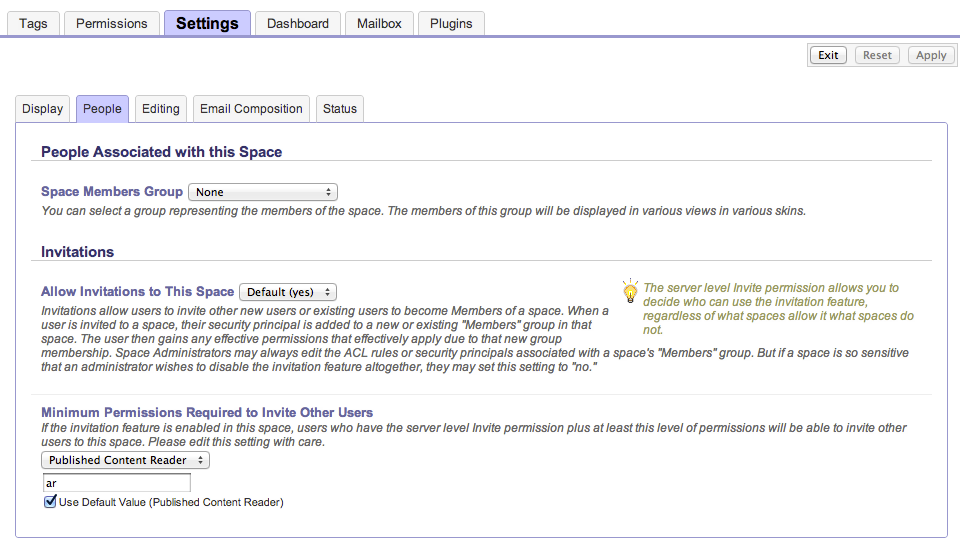
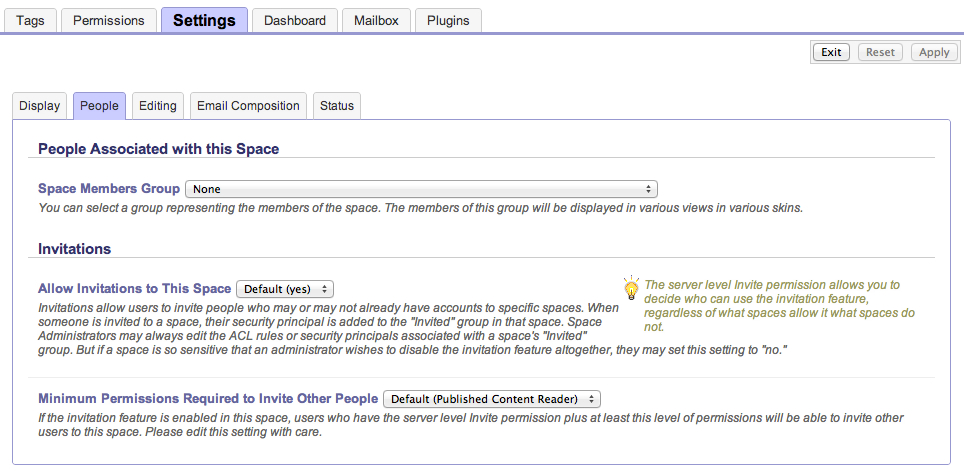
There is no space-level equivalent to the server level Invite permission. But there are two settings that allow you finer grained control over invitations on a per space basis. You'll find them on the new Space Setup | Settings page's People tab, also added in TeamPage 5.
The first setting is the "Allow Invitations to This Space" feature. Use this feature to enable or disable invitations for particular spaces.
You can also disable it by default from the the Server Setup | Defaults page under the Space Settings | People tab. Administrators of individual spaces can then opt in as they wish.
The second setting is the "Minimum Permissions Required to Invite Other Users" setting. This setting is primarily intended to be edited using the selector which offers several standard minimum sets of permissions, each of which represents a role:
- Published Content Reader - Requires just Access and Read Published permissions to be allowed to invite people to this space. This is the default value of this setting.
- Draft Content Reader - Requires just Access, Read Published and Read Drafts permissions.
- Author - Requires at least Access, Read Published, Read Drafts, Author and Edit Own permissions.
- Moderator - Requires at least Access, Read Published, Read Drafts, Author, Edit, Publish, and Lock permissions.
- Administrator - Requires Access and Space Setup permissions.
- Moderator/
Administrator - Requires Access, Read Published, Read Drafts, Author, Edit, Publish, Lock and Space Setup permissions to be allowed to invite people to this space.
If a user tries to invite other users to one or more spaces in which invitations are disabled or in which their permissions in that space don't meet the required minimum, they will see an error message that indicates that one or the other may be true. Besides the case of a user who does not have Invite permission, the Invite link will also be hidden when:
- the view is centered on one or more spaces, all of which have invitations disallowed; or
- the view is an all spaces view, and the server default space configuration disallows invitations.
In a mixed environment -- in which some spaces allow invitations and others don't -- this gives users another cue about what features are available to them in different contexts.
Attachments:
invite-link-1.png
invite-dialog.png
email.png
reply-help-text.png
welcome.png
new-space-acls.png
space-setup-settings-people.png
Space-Settings-People-19Sep2012.jpg
New-Space-Permissions-19Sep2012.jpg
Article: Doc1443 (permalink)
Categories: :Doc:FAQ
Date: July 31, 2012; 5:40:35 PM Eastern Daylight Time
Author Name: Dave Shepperton
Author ID: shep
Categories: :Doc:FAQ
Date: July 31, 2012; 5:40:35 PM Eastern Daylight Time
Author Name: Dave Shepperton
Author ID: shep