Title: Publishing an Article with Instant Publisher
As an alternative to the Add
New Article action from the Traction browser interface, you can
choose the New Traction Entry
option from the TIP V2 system tray menu.
The TIP includes basic HTML formatting options on the toolbar,
and it supports drag & drop and cut & paste from most programs
that support HTML or text.
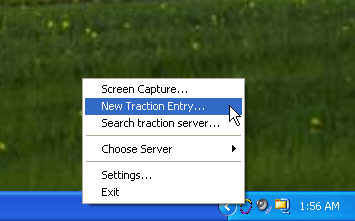
First, right click on the Traction logo. A menu appears.
Left-click the New Article Consists of a Title, Text, Attachments and Labels
option and the TIP V2 form will appear. (see below)
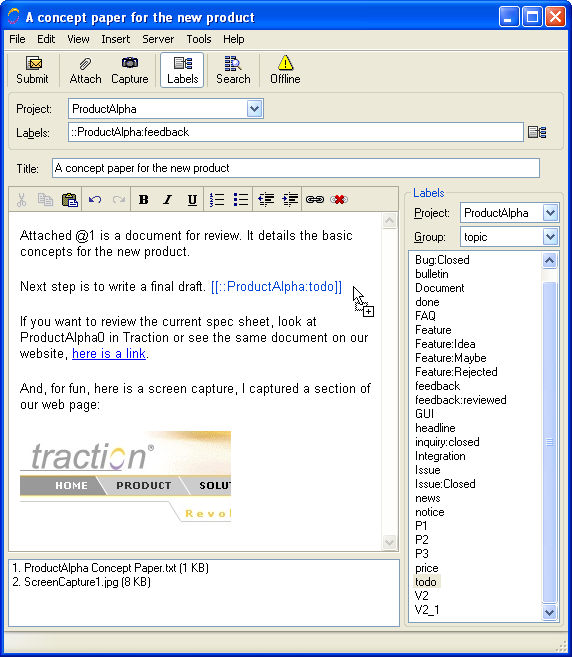
The TIP V2 form will appear. Like the Add
New Article form, you can select a project, add a title and write
text in the body. You can also:
1.Screen
Capture: Put your cursor in the body of the form. Click on the button
with a camera. The TIP V2 form will disappear and a cross-hair replaces
your mouse. Left-click on the upper left of a section of the part of your
screen you want to capture. Hold and Drag to the lower right of the area
for selection. Then let go. An image will appear in the publisher window,
where your cursor was.
Tip:
For precision capture, hold down the shift key to magnify the area
of the screen under the cross-hair.
2.Copy and Paste: Copy any content from a desktop application.
Paste into the publisher form. You can also drag and drop. If you drag
and drop from Internet Explorer, TIP V2 may also include a link back to
original source. Note, tables and other areas with complex formatting
may or may not copy well, depending on the content.
3. Apply Styles:
Apply font style (Bold, Italic, Underline), paragraph
style (numbered list, bullet list, normal, Heading 1 etc..), font color,
and background color.
4.Insert
a link to a website: Write Click Here (or any other words),
highlight the words, right-click, and select Insert Link. Paste
the hyperlink into the box and click OK. This works for file, mail, and
other links too.
5.Add
Labels: You can add labels at the article (title) or paragraph level.
See Adding Labels with the Instant Publisher section below.
6.Add
an Attachment: Simply drag a file into the Attachments window at the
bottom of the TIP V2 form. Or, right click over the Attachment window
and click to browse for a file.
Best Practice
Tip: Always write a good first
paragraph, this will appear in the ExecutiveSummary and in other views
such as the multi-entry view and, in some cases, the front page and project
newspage.
Adding Labels with the Instant Publisher
Labels can be added at the article (title) or paragraph
level.
1.Article Level: To add labels to the
article level, click the label chooser
to launch the Add
a Label form. This form works the same as the Add New Article form.
2.Paragraph Level: To add labels to paragraphs,
click the Labels button in the button bar. A project selector and label
list appears at the right of the form. Left-click and drag a label to
the end of a paragraph. It will appear in this format:
[[::ProductAlpha:todo]] where ProductAlpha
is the project name and Todo
is the label name.
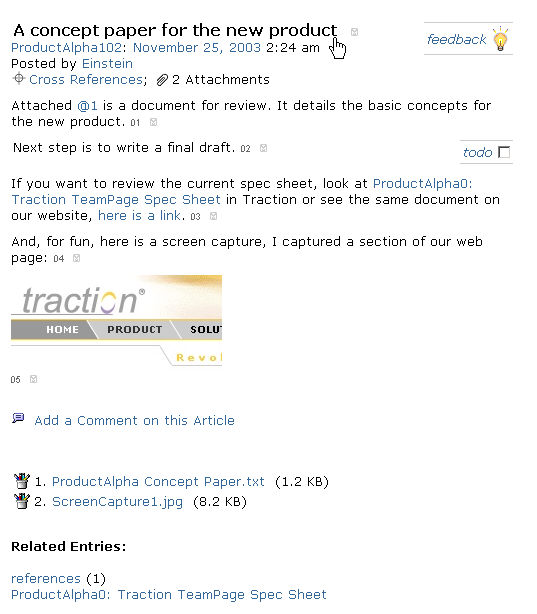
When you are satisfied with your entry, click Submit
to send it to Traction. All the images in your selection are attached
to the Traction article, see below for the result: