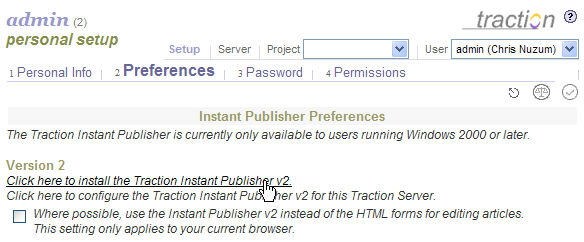
Click on the My Account link from the Tools
menu in your Traction browser. This takes you to your My Account
/ Preferences page.
There is a 3-step process to install the Instant Publisher:
Installation
Configuration (server, user
name, password)
Replacing browser launched
Add Article, Comment, and Edit forms.
Installation
Under Version 2, click where it says Click
here to configure the Traction Instant Publisher v2.
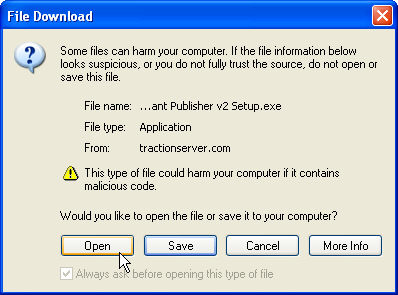
Click Open on
the File Download menu.
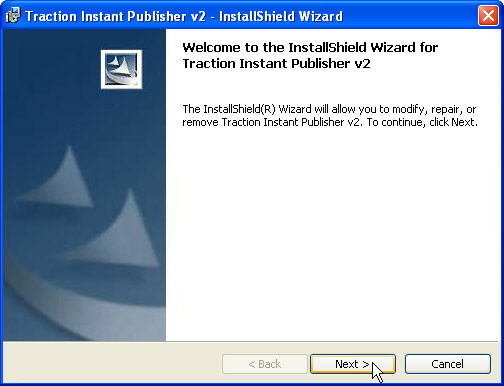
The install files will download and the installer will
start up. Now click Next.
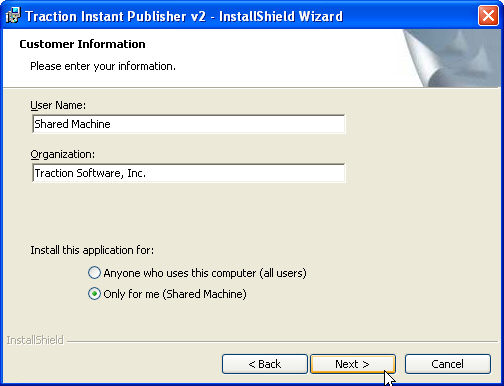
The following form should be filled in. If there is an
option, select to install Only for me,
then click Next.
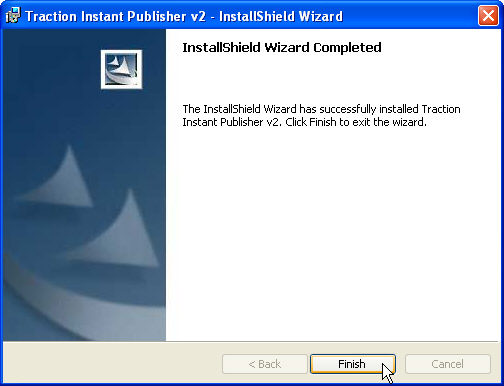
The wizard will tell you that installation is complete.
Click Finish.
The Traction Instant Publisher is now installed and configured
to publish to your server.
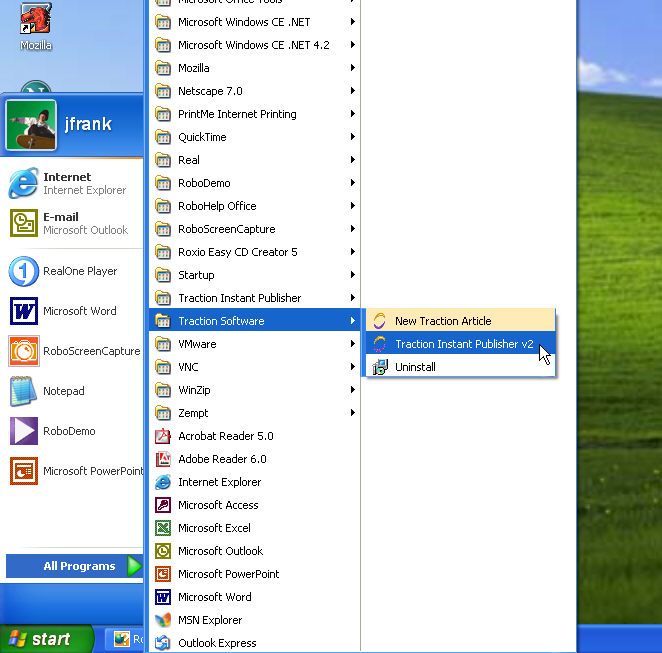
Now, to launch the publisher, you
can navigate to Start / Programs / Traction
Software / Traction Instant Publisher V2
The Traction icon will appear in your system tray
Configuration (Server, user name, password)
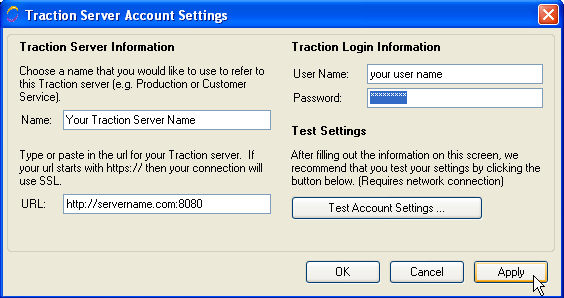
After installation, return to My Account | Preferences to configure
the Instant Publisher. Click on the second line, as in the below image:
This will launch the Instant Publisher settings window with you server
settings and user name applied.
Simply add your password and then click Apply. You can click Test Account
Settings to verify that it is configured properly.
As of Instant Publisher Version 2.1, an Advanced button will also appear
on this form. It is used when the URL used to contact the server differs
from the URL with which the server identifies itself. In these cases,
it is now possible to specify the mapping manually. For
example, you might contact a server via HTTPS but the server may identify
itself as running on HTTP.
Configuring your Instant Publisher for another Server
If you work with multiple Traction Servers,
you can repeat this step on each server. The Instant Publisher has a menu
where you select the server to which you want to publish.
Using the TIP instead of the HTML Add Article, Comment, and Edit forms.
The Instant Publisher can be configured as a substitute
for the HTML Add Article, Edit Article Consists of a Title, Text, Attachments and Labels
and Comment forms which you have
learned about in previous sections of the User Guide. This will give you
a WYSIWYG editor and a richer comment interface with the full capabilities
of TIP V2.
To configure for Edit and Comment, click the My
Account link. The My Account
page will open to the Preferences
page. In the Instant Publisher preferences section, check the box next
to the text that says:
Then click the Apply
icon in the upper right or bottom of the screen.